For the last 45 or so years, I have always had at least one classic
bike in the shed. For much of that time they were just old bikes; worth
very little and used as day to day transport. Most of them were
Nortons, but like most others of my era, I picked up whatever was
around at the right price or could be swapped for whatever I had tired
of. Since early retirement a few years ago I have had the opportunity
to work my way through some of those that I've never previously owned -
including a Velo Venom, BSA A10, Matchless G80S and Triumph unit twin.
Pre-war hand-change machines have always fascinated me, and think the
Sunbeams of the vintage and immediately post-vintage eras are
particularly attractive. So when I saw a 1931 Model 10 350 on offer
from Andy Tiernan in Suffolk, I couldn't resist making a deal with my
Triumph and a substantial cash contribution.
The Model 10 may not have been the best choice for a first-time early
post-vintage machine: produced for only 2 years, being Sunbeam's
response to the Depression which had seen them largely priced out of
the market, as most of their machines were seen as (and were) more
expensive than much of the competition. Sadly for the company, it did
not sell well even at £65 and I believe only a dozen or so
are still in existence. Much of the bike is specific to the model, and
I shudder to think of the tooling and production costs of bringing a
totally new design to the market at such a time. This of course makes
sourcing spares a real problem.
However, I like a challenge, and thought the Model 10 was a very
handsome machine, having a lean purposeful stance and being devoid of
the spaghetti-like oil plumbing seen on other contemporary Marston
models. A Motor Cycle road test of the time suggested that few machines
could be more charming on the road and that it was fast, smooth,
comfortable and handled superbly with exceptional acceleration. It was
also said to be able to achieve 100 mpg - I suspect largely due to its
very low weight (230 lb or around 105 Kg) and minuscule 7/8" bore
carburettor, and had the "impressive yet restrained appearance for
which the make has always been famous".
A visit to the VMCC library at Allen House provided me with a number of
photocopies of period magazine road tests etc that have proved very
useful, as did the magisterial Sunbeam history from Bob Cordon-Champ.
In common with many pre-war manufacturers, Sunbeam's own publications
are sketchy in the extreme and the manual (obtained from the Marston
Sunbeam Register) makes only passing reference to the Model 10. The
Pitmans book is little better and the parts list is similarly unhelpful
with blotchy and blurred drawings which give little indication of what
parts look like or how they are assembled. There was a little
information on the Marston Sunbeam Club (which I joined) website and
www.Sunbeamsidevalve.com. So unlike most of the bikes I've owned, I was
very much on my own with this one.
As bought.
The blurb from Andy Tiernan's website suggested that the Model 10 was
ready for final fettling although I have to say that was optimistic in
the extreme. The photographs rather flattered the bike as is often the
case, the paintwork especially being in a much poorer state than it
appeared. Still, I have no-one to blame but myself as I bought the
machine sight unseen. I have rarely bought bikes via dealers, much
preferring to deal direct with a previous owner, and suspect I wouldn't
repeat this particular error. However, the part-exchange deal did mean
that I wasn't left with another bike on my hands which I would have
needed to move on - my garage not being able to cope with the vast
stables some seem to manage. It's always a case of one in one out.
Once the Model 10 arrived I discovered that it had been through a
number of hands and had been returned by at least one buyer as not up
to standard. However, that buyer had paid substantially more than I had
(although I think I paid quite enough).
When it arrived it was obvious that a number of items required
immediate attention:
The cycle parts had been well primed but then sketchily blown over with
an aerosol leaving large areas with the primer visible;
Neither brake worked at all;
The clutch slipped so much it was impossible to turn the
engine over;
There was no exhaust valve lifter mechanism;
The oil pressure indicator had been replaced by a gauge
(situated in exactly the right position to be kicked off by the right
foot);
The electrics lacked any attempt at wiring although
dynamo, lamps and a very attractive sunburst horn were present;
All chrome work was very poor;
The engine and gearbox were unknown quantities although
said to run with slight clutch drag;
There was no air lever or air slide for the carburetter;
There was no dip switch / horn button.
Having said this, the machine was largely complete.
I had hoped to do some light tidying up before putting it on the road,
but this list of faults (especially clutch and brakes) made me decide
to put it to one side, enjoy the remaining weeks of summer on my
modern(ish) machine, and start serious work in the autumn.
I'm not a great fan of the so-called original and unrestored machines
which are currently fashionable as in many cases these are nothing more
than rusty neglected heaps - or indeed complete fakes such as the 1930s
Norton featured in a recent edition of RealClassic magazine. I do make
an exception for real historic machines which show the authentic marks
of a life well-lived such as Ted Simon's Triumph currently residing in
the Coventry Museum of Transport. It's most unlikely that a bike has
lasted well over 80 years without having major components replaced. On
the other hand, I wasn't aiming for a dazzling concours winner as that
would probably make it unlikely to be ridden (or indeed ever finished)
as well as driving costs to an unacceptable level. Smart, tidy and
well-cared for was the state I was after. I also wanted to keep as much
of the original bike as possible (although of course how much of it
left Sunbeamland at the same time is a moot point).
Clutch and transmission
The first task was to check out the clutch. As I dismantled it, it
became clear that it was a mismatch of bits and bobs, some probably not
even Sunbeam. In particular the backplate had been crudely welded to
the kickstart ratchet and had an extra clutch plate welded to its face.
The whole lot was eccentric and wobbled all over the place. However,
the pressure plate and corks seemed to be in a reasonable state. It is
a variation on the single spring design, which does not enjoy a
positive reputation, fitted to some other Sunbeams.
I was fortunate to meet Vic Youel of the Marston Sunbeam Club at the
VMCC Founder's Day event and he very kindly supplied me with some
(almost) correct parts to rebuild the clutch. Once I had these and had
made the necessary modifications including turning a split spacer to
align the primary chain, it was possible to turn the engine over and I
was pleased to discover that compression was reasonable and that the
engine turned freely. Later careful attention to the operating
mechanism gave me a clutch that freed reasonably well although with
some dragging. Adjustment is critical - a slight turn on the adjuster
makes a huge difference.
The Sunbeam range with the famous oilbath primary chaincases are fitted
with clutch stops. The idea behind these is that when the clutch is
fully withdrawn the pressure plate contacts the stops which are fitted
in the outer chaincase, slowing it down and helping a clean gearchange.
I tried the "book" method of setting these with little success, finally
developing a way of adjusting them one at a time. First I unscrewed
them both till they were well clear of the clutch plate when on full
lift. Then, by putting the bike in top gear on the stand and adjusting
one stop inwards until when the clutch lever was fully pulled in it
became hard to turn the back wheel I could tell that the stop was
contacting the plate. I then backed that stop off a full turn, repeated
the process with the other, finally resetting the first stop. This did
seem effective when I actually rode the bike for the first time.
The gearbox selected all gears smoothly and turned quietly although
virtually devoid of oil, so after adjusting the linkage I decided to
leave well alone and merely to replace what oil was in the box with
Spheerol semi-fluid grease giving less opportunity for it to leak all
over the back tyre. The primary chain and engine shock absorber were in
good order although I had to make a crankshaft nut with a shoulder and
castellations for the split pin.
Brakes
As mentioned, neither brake worked on delivery. Both cables were rusty
and the outers frayed but I always make new cables for any newly
obtained machine so that was not a problem. When I took the wheels out
it was clear that the linings were useless so I had new high friction
linings fitted by Villiers Services in Merry Hill. They do an excellent
job and are happy to fit appropriate linings for the size of drum. Once
fitted, the brakes seemed much better although of course I would have
to wait for a road test before being completely satisfied.
Paintwork and Plating
Although the cycle parts were basically sound and had the benefit of a
good primer coat, the finish was very poor and there were large areas
which had been missed altogether. In general however, the underlying
metal was sound. So I decided to repaint everything except the petrol
tank which was stated to be new and, to be fair, had a reasonable
finish although lacking the customary gold lining.
Much work rubbing down and many coats of Hycote Bodyshop black aerosol
resulted in an acceptable finish.
The frame and smaller parts were no problem; I always find mudguards a
bit difficult as it's necessary to paint to a wet edge which is tricky
with a big area but was happy with the results. I used 3M narrow
flexible tape to mask out the tank for the gold lines which I applied
with another aerosol. Not up to Marston standards I'm afraid but much
better than it was when it arrived.
The brightwork on delivery was in a very poor state so I entrusted
chroming and some nickel plating to a local firm, Chromefix of Balsall
Heath, who did an excellent job at a very fair price. Again wishing to
retain as much as possible of the original, I opted to keep the
exhausts despite some minor dents as I felt these added to the
character of the bike.
Engine
I already knew the exhaust valve lifter and oil pressure tell-tale were
missing. Unique to the bike, it was most unlikely that I'd be able to
find replacements so needed to manufacture them. I have a Granville
centre lathe (cheap Myford copy) which is probably of similar vintage
to the Model 10, so designed the components to suit the style of the
bike and (with many helpful suggestions from the IKBA forum) set to
producing piles of swarf and eventually ended up with reasonable items.
This is the valve lifter:
All Marston Sunbeams have oil tell-tale or pressure indicators, but the
thread locating this component in the timing cover on the Model 10 is
different to the others being 7/16" Cycle. I sketched what I thought I
needed and uploaded this to IKBA for comment. Some very helpful
feedback improved my original design substantially so I set to with the
trusty Granville and produced an item which looked the part and, more
importantly, seemed to work effectively.
Fitted:
The rocker box, head and barrel were removed as a matter of course and
I was very pleased to see that almost everything seemed in good order
and clearly had run little since last being assembled. The piston, bore
and rings were fine. There was no appreciable play in the big end or
main bearings and the crank rotated smoothly so I opted to leave the
crankcase assembled. I did however need to make a new phosphor bronze
bush for the exhaust rocker spindle.
When I had the assembled head upside down to check valve seating, I was
horrified to see one of the exhaust valve collets drop out onto the
bench! If this had happened with the engine running, it would have been
a disaster. I found that the collets were entirely the wrong profile
for the spring retainer so again, replacements not being available, I
turned a pair out of a scrap HT bolt. Getting the taper right was
tricky but eventually I was satisfied with them. The collet locating
groove in the valve was also somewhat bashed about so I used a Dremel
with a small mounted grindstone on the lathe's toolpost to tidy this up
- it only needed a light cut to restore it. After checking valve and
guide wear (within acceptable limits) I could then reassemble the head.
One of the long head studs looked as if it had been filed from an old
bit of scrap so I made a new one (double diameter as the bottom end
thread in the crankcase had been enlarged) out of stainless.
Timing cover
This had clearly been through the wars. The extension for the magneto
chain had broken at some time (probably due to levers being used to
remove the magneto sprocket) and repaired with a steel fishplate.
The lower extension which contains the oil feed from the sump to the
pump had been overtightened and fractured, possibly by the same owner,
and repaired with brittle glue of some sort.
I tried all the avenues I could think of to source a replacement cover
but hen's teeth seem to be easier to come by. So I had to live with
what I had, replacing the brittle glue with JB Weld and using a thick
paper washer and Loctite 5922 to make an oil-tight seal at the joint
with the crankcase / sump. I had considered a welded repair, but
general opinion was that such an old casting would be very problematic
and I didn't want to end up with an unusable component.
Magneto sprocket
When I rotated the engine I was alarmed to see the whole magneto moving
up and down with the engine rotation. Removal of the chain cover showed
the chain varying between bar taut and totally slack. It was clear
there was some eccentricity somewhere. When I removed the mag sprocket
I could see that it looked quite bodged and that the sprocket itself
was welded to the cylindrical portion rather than being integral with
it.
Making a new one was beyond my (and the Granville's) capabilities so
after making a sketch of the required item I contacted Bob Humbernut
Rodgerson who kindly put his new CNC machine to use and made me a super
component which ran very true. There was still some variation in chain
tension but selective assembly of the drive sprocket on the inlet cam
spindle reduced that to an acceptable level.
Electrics
As delivered, the electrical system looked complete although lacking
bulbs and any trace of wiring. Against better advice, I decided to
rebuild the 3-brush dynamo as original complete with its internal
cutout and half-charge resistor in the light switch rather than convert
to 2-brush operation and a solid-state regulator. The dynamo was in a
real state having its field winding and brushes all disconnected.
However, it was relatively straightforward to strip and rebuild it
(although the system of earthing the field through the light switch and
its internal resistor rather than supplying a live feed to it as on
later versions caused me some head scratching).
The drive end bearing was very rough so I replaced that although the
commutator end was fine. A quick skim of the commutator with a sharp
knife tool in the lathe followed by undercutting the mica segments and
charging was enabled. I tested it by mounting it under the pillar
drill, driving with a bit of rubber hose to account for misalignment
and with the field coil terminal earthed got a satisfying voltage
rising to around 12 volts. I tested the integral cutout by applying 12
volts from a spare battery to its input which resulted in a satisfying
click. I hoped that it would cut in at the required 7 - 8 volts.
The commutator end:
Test rig (pillar drill driving through a bit of rubber hose). Not
running as I didn't have enough hands to hold it steady as well as
taking a photo:
The wiring was a straightforward job; I used black thinwall PVC
insulated cable housed in nylon braided sleeving throughout: not
original but it looks the part. It goes without saying that there are
no pre-insulated crimp connectors to be found. A pattern dip / horn
switch and 6 volt bulbs were sourced from Ebay. I always fit dedicated
earth wires connecting the battery, engine, handlebars and headlamp to
avoid problems resulting from fresh paint, grease etc. I fitted a small
gel battery inside the hard rubber Exide case that had arrived with the
bike as I've found these batteries to be cheap and reliable. A 15A
blade fuse was fitted on the earth side which I believe gives slightly
better protection than one fitted on the live terminal. The incorrect
fluted headlight lens was replaced with frosted glass from a local
glass merchant. Finally a cheap ebay bicycle speedo was fitted to avoid
being done for speeding (I should be so lucky.....)
Lucas helpfully provided a wiring diagram on the rear of the light
switch:
Testing the magneto with a cordless drill showed a good strong spark
even on full retard so all I did was to check that the spindle rotated
smoothly, remove the points and clean them up and refit / regap and put
it all back together. Fitting the magneto and adjusting its chain
tension was something of a nightmare as access to the securing nuts was
very restricted. I understand that Sunbeams were supplied with a
special bent spanner as part of the toolkit but unfortunately this was
missing from my bike. Timing was a simple operation - I use a piece of
kitchen foil to detect the points opening as I find the usually
recommended Rizlas too fragile. I did feel the specified timing figure
of 5/16" (30 degrees) BTDC seems a little on the late side. However, it
should prevent pinking on unleaded 95 octane.
Cycle parts etc
The wheel bearings rotated reasonably smoothly and could be adjusted to
give minimal play at the rim so I opted to leave them in place and
merely pack with fresh grease as I was very doubtful about sourcing
replacements. I was entirely new to girder forks so decided to strip
them, being pleased to find little wear in the spindles and links so
again reassembled with fresh grease after cleaning out the old stuff.
The Cheng Shin tyres fitted were in decent condition and of an
appropriate pattern, and as I plan to ride the Model 10 only in dry
conditions I merely removed them, checked the rims and spokes, and
replaced the tyres after painting the bare wheels. The rims were pitted
but basically sound and the spokes in good condition so in line with my
wish to retain as much as possible of the original machine I decided
not to rebuild them with new rims and spokes although I always enjoy
this task. I didn't want to damage my newly painted rims so managed to
fit the tyres without the aid of levers (although copious amounts of
tyre soap helped).
Those little bits that always take so long.....
Apart from the items specifically mentioned, there were many small
parts either missing or incorrect including head steady, clutch cable
return spring anchor, etc etc. All these were easy to fabricate using
basic hand tools and material from the scrap box. New control cables
were made and fitted all round. One advantage to a pre-war machine is
that so much of it is simple in design and capable of being reproduced
- or at least decent substitutes made - by the amateur.
Completed
I have of course tailored the riding position to my shape and size
which means having the handlebars in a high position - leading one IKBA
contributor to liken it to a startled elk. I can see what he meant, but
comfort and controllability are taking precedence over aesthetics at
this stage. Expert Sunbeam owners know that the front brake on most
models is to be found on the left hand bar where you might expect a
valve lifter, with the valve lifter on the right. This was a step too
far so I opted for the more conventional and familiar layout.
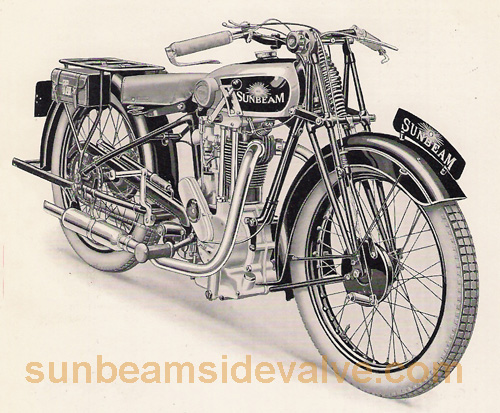
Comparison with catalogue pictures:
It runs!
It was with some trepidation that I put a couple of litres of petrol in
the tank, opened the petrol tap (noting a slight weep from the union
which would require attention), set the ignition to half retard and
closed the air lever. A couple of priming strokes then I eased over
compression using the valve lifter (which I was very pleased to see
worked well) and applied the long swinging kick. This resulted in a
cough from the exhausts. A couple more attempts gave the same result so
I depressed the tickler for a few seconds and tried again.
It now started immediately and after some minor adjustments to the
throttle stop idled very nicely and picked up well to a blipped
throttle. However - my oil pressure telltale refused to show any
pressure. I stopped the engine and removed the telltale - there was no
oil showing in its housing. Following the sketchy instructions in the
manual, I tried starting again with the telltale removed but there was
no sign of oil appearing at all. So I stopped the engine, retired to
the shed and removed the timing cover to investigate.
I must say I had been a little dubious about the design of the
lubrication system, which is of the wet sump type unlike all other
Sunbeams. The oil level is around 4" below the crankshaft-driven oil
pump, and is connected by a drilling in the timing cover. So on initial
start the pump is running in air and has somehow to draw the oil up.
It's interesting that photographs of the prototype engine in
Cordon-Champ's book show a somewhat different lubrication layout so an
early redesign seems to have been carried out.
To check the pump operation, I built a test rig which essentially
comprised submerging the bottom end of the timing cover in a jug of oil
and rotating the pump with a cordless drill. After some time, a bubbly
stream of oil emerged from the telltale and restrictor housings.
Refitting the restrictor and telltale showed the latter popping out
under pressure in a most satisfactory manner. So all that remained was
to refit the timing cover hoping to re-achieve the oil-tight fit I had
eventually managed on the original build. I had just not waited long
enough in my first attempt.
On starting the engine, at first I was concerned that my work had been
in vain as the telltale remained obstinately closed. However, as I
opened the throttle I was pleased to see it move outward showing that
pressure and flow were being achieved. In fact, the design seems to
only work above a certain engine speed - possibly there is a threshold
below which the gear wheels aren't turning fast enough to overcome the
partial vacuum below the pump. So had I been brave enough to run it at
a higher speed on my first attempt I could have avoided some extra work
and worry.
Deviation, hesitation and repetition
A week or so after this, I was fortunate enough to attend the first
National Motorcycle Musem's "Ride a Classic" day. What a superb
experience and a rare opportunity to get aboard exotica such as George
Brough's personal Brough Superior SS100, a Vincent Black Shadow, and
even a Norton F1 rotary whose riding position was unfortunately far too
cramped for a normally proportioned human being, as was the BSA RGS
also on offer. My favourite of the day was of course the 1928 Sunbeam
Model 90 which was superb to ride and handled the tight twisty course
easily so I had a couple of shots on it. The bigger bikes - especially
the Brough - were at a disadvantage having heavy, slow steering and
being far more suited to the open road. Here I am looking rather more
confident than I was feeling......
On the road
Having completed the Sunbeam build I was itching to try it (combined
with a certain nervousness I must admit). Despite my reluctance to
venture out amongst the bank holiday traffic, Good Friday was too
bright and sunny to ignore.
So out of the garage, start first kick, on with the helmet &
gloves after checking the oil telltale then idling sweetly while I
rolled it off the stand.
Into first with a barely perceptible clunk (clutch stops doing their
job) then wait at the end of my drive for a break in the cars.
I live on a suburban road in Hall Green and the least stressful route
away from home involves 2 roundabouts about 1000 yards apart then a
stretch of road about a mile long. All with cars parked on both sides,
driveways with inattentive drivers poised to reverse in front of me as
well as being used as a rat run at busier times of day.
I managed a successful change to second before the first roundabout
then found first while I waited - then through the gears into top
before slowing for the next one. I was very satisfied to feel the lack
of shake and wobble from the forks although I suppose I barely reached
30 mph.
Crackling away from the second roundabout and up into top I was feeling
very pleased so decided to stop and turn round in the road before the
point of no return. After which - mini disaster. As I was giving it
some throttle in 2nd the back wheel locked up. I whipped the clutch in
and I found the engine had locked solid. I pushed to the next
roundabout, the light weight being a boon here, letting the engine cool
down, and tried the kickstart again to find it had freed off and
fortunately still showed excellent compression.
I started it up again and it sounded fine with no nasty rattles so
gently rode it home. I suspect the problem is that I hadn't unscrewed
the oil feed restrictor enough - it was about 3/4 of a turn out from
fully home. There's virtually no information to be found about how to
set this. I'll try it much further out. Better to have a blue haze
following me than bits of seized piston........
This brief run did show up some areas requiring attention. The throttle
had an action like a blunt knife through gravel. The inverted front
brake lever was flopping about. Petrol was weeping from the union at
the bottom of the tap. The tappets had bedded in and required further
adjustment. However most things looked fine. A replacement twistgrip
and materials to make a new cable were soon on order; the petrol weep
was discovered to be a split union nut (a rifle through my scrap box
turned up a replacement); the brake lever shimmed and tappets
re-adjusted, all followed by a general check-over for loosened
fastenings etc.
A few hours in the workshop with pencil blowtorch and solder had a new
throttle cable made. The twistgrip had an internal diameter of 15/16" -
matching a reduced section of the handlebar - which I understand to be
a pre-unit Triumph pattern so this is what I used although it had to be
significantly shortened to allow the front brake lever to be assembled
to the end of the handlebar. This all gave a silky smooth throttle
operation so was well worth while.
On the road again.....
The first opportunity to try the improvements was a few days later due
to other commitments. Fortunately this time it was a bright mid-week
day so little traffic to hinder me. Again, a first kick start and I was
impressed by the way the clutch took up the drive gradually. I found
that upward gear changes were virtually silent, probably thanks to the
clutch stops. However, being used to later machines, I was trying to
change down at much too high revs and road speed causing some horrific
crunching. After some practice, I started waiting for the downward
change till the engine was starting to get unhappy on the higher ratio
and this proved much better. I know there is a left hand across the
tank technique which ignores the clutch and uses the false neutrals
between the gears to effectively double declutch - this is a method I
will save for later. For the time being, I had realised that I could
pull away from walking pace in second with the ignition fully retarded
so tried to time my arrival at junctions and roundabouts to use this
tactic.
This time I successfully reached my previous furthest point and
returned with no problems, and particularly no tightening up as had
happened on the first test run. When I returned home I realised that I
had now set the adjustable oil feed too far out as I was getting quite
a lot of oil around the valve guides so screwed it in to be around 2
turns out from fully home. I also decided that the spring in my oil
pressure tell tale was on the strong side as it was tending to stay in,
despite a good flow of oil, so substituted a lighter one.
After these minor adjustments I again set off for a rather longer run,
of about 5 miles, including the aptly named Paradise Lane (some lovely
Victorian cottages) and Webb Lane in honour of the front forks.
Everything was going well: the front brake was now offering some
retardation although the rear was still poor; my cycle speedometer
showed I'd reached a speed of 40 mph with no concerns about the
handling; and I was feeling confident that I could take the little
Sunbeam further afield.
There were of course a few loosened fastenings and the petrol tap still
wept a little. Unfortunately this had dripped on the Little Oilbath
transfer which, even though protected by supposedly petrol resistant
lacquer had crinkled, so further work yet to be done. The clutch was
slipping slightly as it had bedded down so needed minor adjustment. But
I was very happy and pleased with my first pre-war restoration and was
looking forward to many miles on the leafy Warwickshire lanes.
Update
Having now had the opportunity for a couple of further runs, I am
increasingly comfortable with the Sunbeam and the way it goes. Now the
slipping clutch is sorted out, it pulls like a train and although I
have yet to venture beyond the suburbs, I have seen an easy 45 mph with
plenty left to come. The forks cope well even over quite rough
surfaces, and the well sprung saddle looks after the other end. The
front brake is bedding in nicely and even the rear is helping to slow
the plot down. Downward gearchanges are still something of a challenge,
especially as I need to look at the gate to remind myself where the
detents are, but leaving them as late as possible helps. The engine has
developed a slight oil leak which will require attention at some stage
but it can wait for the time being.
Feeling confident, I decided I would make an attempt at the RealClassic
Compass Challenge. It was fairly easy to find appropriate
places in suburban Brum - here they
are.
Sunbeams were always known as the gentleman's motorcycle. Although I
hesitate to apply this description to myself, the machine itself is
indeed gentlemanly and I am so pleased I decided to tackle it.
Further Updates
I was still having a slight problem with the engine tightening up when
worked hard, as well as the recurrence of the clutch slip problem, so
took the Sunbeam off the road
at the end of Summer 2016 to deal with these and other minor problems.
When I removed the cylinder barrel again, I was pleased to see that
there seemed to be plenty of oil around (I had been worried that the
tightening up had been due to lack of lubrication) and that the bore
was unmarked. There was however a slight scuff on the piston.
When I measured the clearance of the piston in the bore, it was only
around .004". Most of the reference material I could find suggested it
should have been closer to .006" - .008" (a minimum of .0025" per inch
of diameter is quoted in Radco's Vintage Motorcyclist's Workshop). So I
decided to have four thou honed out. A local old-school engine
reconditioner
whom I've used in the past did this for me and I was very pleased with
the result.
The slipping clutch posed something of a problem. The clutch is
actuated by a pushrod through the mainshaft like many British bikes.
The pushrod engages with a transverse pin which passes through a bored
hole in the boss of the pressure plate (top left in the photo). This
travels in a slot in the mainshaft to allow end to end movement.
I deduced that the pin was hanging up on the inner end of the slot
hence not allowing full clamping pressure to be applied to the clutch
plates. Bob Rodgerson came to my aid once again
and bored a further hole some 5/16" further out to allow full travel of
the pressure plate. On reassembly this seemed to have done the trick.
Bob also happened to be selling his Tormach
mini-lathe so I seized this opportunity to replace the Granville which
had given good service but was really getting too long in the tooth for
accurate work.
While the bike was up on the bench it was also a good opportunity to
make a new exhaust retaining ring for the left side exhaust pipe - the
existing one's threads were worn and it
had only a nodding acquaintance with the stub on the head. This gave me
the opportunity to use the Tormach for a job which is always tricky -
large internal threads, without the opportunity to try the mating
thread whilst in the lathe. The slots for the C spanner were cut by
hand with hacksaw and file. I was very happy with the result:
I also needed to redo the gold lining on the petrol tank. I had
foolishly used ordinary enamel for my first attempt and this had proved
remarkably susceptible to being washed off by
fuel. So I made a number of test pieces to check compatibility of gold
paint and various lacquers including a petrol-proof version -
eventually coming up with a viable combination.
I do the lining by carefully using 3M 3mm flexible tape on either side
of the desired line, followed by ordinary masking tape and newspaper to
avoid any overspray. This works very well but it's always a tense
moment removing the tape. Fortunately all was well, if not as beautiful
as would have been achieved by the skilled painters at the Marston
factory.
New corks for the Ewart petrol tap cured the minor weep I'd experienced
earlier.
The slight oil leak was coming from the base of the timing cover where
it forms the feed for the oil pump. This is a semi-wet sump engine,
carrying the oil beneath the crankcase in an extension to it, as
described earlier. The design of the timing cover joint to the oil tank
is poor, with a very narrow flat on the oil tank for the timing cover
to seal against.
Of course, an oil leak at this point eventually results in the complete
contents of the oil tank ending up on the floor. As with much else, the
parts list is silent on how this was intended to be sealed.
Much work truing faces, building up with JB weld and manufacturing
sealing washers from gasket paper and Viton sheet as well as judicious
use of Wellseal and silicone
has now given a true oil-tight seal, after many trial fittings. The
timing cover is probably still the part of the bike I'm least happy
about, but concentrated efforts have failed to turn up a replacement.
It is however doing the job.
The future
I feel I have been successful in converting the proverbial sow's ear
into, if not a silk purse, certainly a handsome and effective machine.
There is little further to do to it,
although of course a perfectionist would disagree! I have therefore
decided to part with the Model 10 and look for a new challenge for
2017.
Here is a short video of the bike running on a local road (Webb's Lane):
This has been a challenging project, and my thanks go to:
Vic Youell of the Marston
Sunbeam Register. I have to say that apart from Vic, the Club
was of little help in my task (although friendly) and did seem more
oriented towards events. This is fair enough but to me it offers poor
value as my principal reason for being a club member is the technical
aspects of owning and riding examples of the marque.